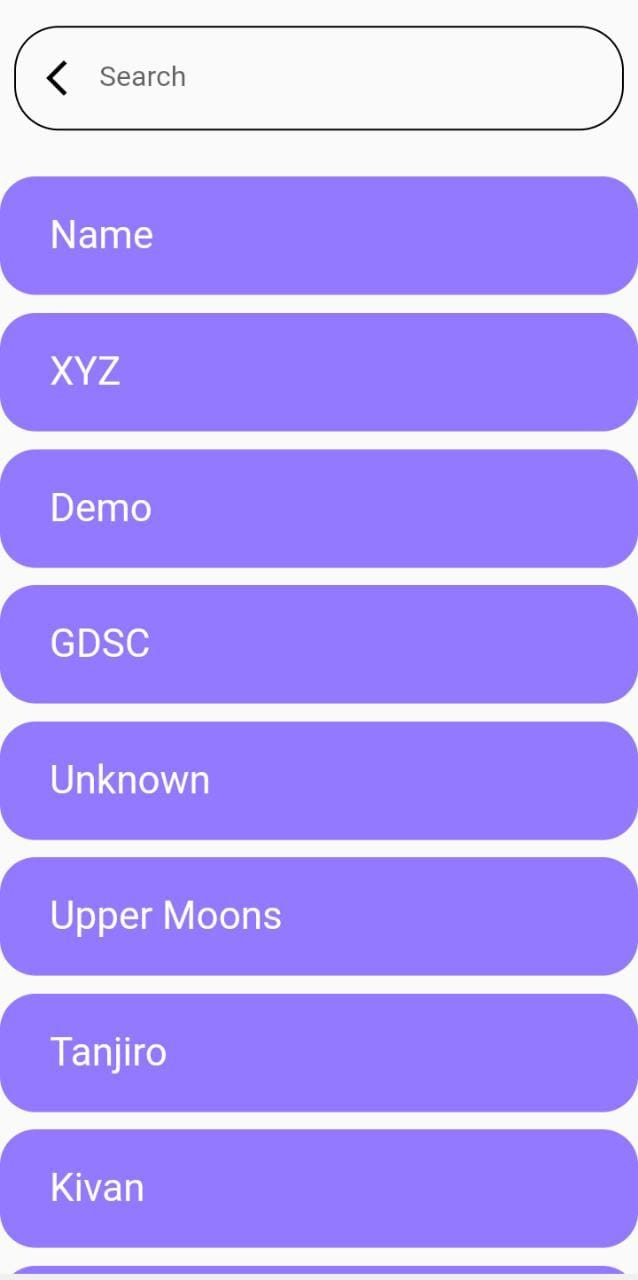
The lack of a built-in search bar Widget, equivalent to a SearchView for Android, UISearchBar accessible when creating for iOS, or a SearchBar in React Native, was one challenge I recently faced while designing a mobile application using Flutter.
I was able to identify a couple of Dart Packages that attempted to fix this problem, but I chose to solve this myself rather than depending on the third-party packages’ upkeep and health.
Now I’ve made the decision to do it on my own. So let me break the task into small steps.
Step 1- Creating a model of a searchable list
when it comes to models, classes come 😉.
First of all, we have created a class named as a model having a name field
class model {
 final String name;
 model({this.name});
}
Then we will make a list of the model class, explicitly.
  // List of items to be searched
List<model> Items = [
 model(name: "Name"),
 model(name: "XYZ"),
 model(name: "Demo"),
 model(name: "GDSC"),
 model(name: "Unknown"),
 model(name: "Upper Moons"),
 model(name: "Tanjiro"),
 model(name: "Kivan"),
 model(name: "India"),
 model(name: "USA"),
];
We can also take data from the internet in form of HTTP response in this project. But that part could be more lengthy so we will cover that part in the upcoming articles.
So we have created a local list (searchable)🙌.
Then we also have to create a list of items to be filtered after searching
// List of item to be filtered after searchingList<model> filteredItem = [];
Step 2- Creating the UI of the App

Widget build(BuildContext context) {
 Size size = MediaQuery.of(context).size;
 return Scaffold(
    body: SafeArea(
    child: Column(
       children: [
          Padding(
            padding: const EdgeInsets.all(8.0),
             child: Container(
                  width: size.width,
                  height: size.height * 0.1,
                  alignment: Alignment.center,
                  child: TextField(
           // controller: textController, We will declare this later
                  decoration: InputDecoration(
                      prefixIcon: Icon(
                         Icons.arrow_back_ios_new_sharp,
                             color: Colors.black,),
                   hintText: "Search",
                   enabledBorder: OutlineInputBorder(
                        borderRadius: BorderRadius.circular(25)),
                  focusedBorder: OutlineInputBorder(
                         borderRadius: BorderRadius.circular(25),
                         borderSide: BorderSide(width: 2)),
                ),
             ),
           ),
          ),
    Expanded(
    child: ListView.builder(
     itemCount: filteredItem.length,
     itemBuilder: (context, index) {
           return Container(
              margin: EdgeInsets.only(top: 10),
               width: size.width * 0.9,
               height: size.height * 0.0888,
               alignment: Alignment.centerLeft,
               decoration: BoxDecoration(
                   color: Color(0xff9379FF),
                   borderRadius: BorderRadius.circular(20)),
               child: Padding(
        padding: const EdgeInsets.only(left: 28),
         child: Text(
           filteredItem[index].name,
           style: TextStyle(
           color: Colors.white,
           fontSize: 22,
           fontWeight: FontWeight.w400),),),
                   );
                })// ListBuilder
           ), //Column
          )//SafeArea
           ); //Scaffold
But we have to initialize our filteredItem with Item in the initState() function of the class of the screen.
void initState() {
super.initState();
filteredItem = Items;
}
Step 3- Declaring TextEditingController listener for TextField and adding its Listener, too.
For controlling the text entered in the TextField, we have to make an instance of TextEditingController, named as textController
final textController = new TextEditingController();Before adding a listener, we will declare two global variables
String searchText = ""; // to store the search text in TextField
bool found = true; //to store whether searched text is found or not
Now adding the listener of textController in the initState() function of Stateful class
void initState() {
super.initState();
filteredItem = Items;
textController.addListener(() {
      if (textController.text.isEmpty) {
        setState(() {
          searchText = "";
          found = true;
          filteredItem = Items;
        });
      } else {
        setState(() {
          searchText = textController.text.trim();
        });
        // Function for checking the items in List searchFunc();
      }
    });
}}
Step 4- Making the Function which will be invoked for Searching
The basic approach is that we will iterate through Item list and check whether searchText contains the list if it does then we will add Item at that index to a temporary list. Then later on we will equalize our filteredList with that temporary and set found equal to true in setState() Function
Let’s code it🤞.
void searchFunc() {
    List<model> tempList = [];
    if (!searchText.isEmpty) {
      for (int i = 0; i < Items.length; i++) {     if(Items[i].name.toLowerCase().contains(searchText.toLowerCase())) {
          tempList.add(Items[i]);
        }
      }
      setState(() {
        found = true;
        filteredItem = tempList;
      });
    }
   if (filteredItem.isEmpty) {
      setState(() {
        found = false;
      });
    }
  }
Looks great.
Wait but what if searchText is not available in the Item list😥.
No worries 😎, we already declared a global variable named found. So if found is true then we will display our List(filteredList) otherwise we will display Text as “Not Available”
Sounds good! Let’s code this approach, too.
Expanded(
     child: found
                  ? ListView.builder(
                      itemCount: filteredItem.length,
                      itemBuilder: (context, index) {
                        return Container(
                          margin: EdgeInsets.only(top: 10),
                          width: size.width * 0.9,
                          height: size.height * 0.0888,
                          alignment: Alignment.centerLeft,
                          decoration: BoxDecoration(
                              color: Color(0xff9379FF),
                           borderRadius: BorderRadius.circular(20)),
                          child: Padding(
                           padding: const EdgeInsets.only(left: 28),
                            child: Text(
                              filteredItem[index].name,
                              style: TextStyle(
                                  color: Colors.white,
                                  fontSize: 22,
                                  fontWeight: FontWeight.w400),
                            ),
                          ),
                        );
                      }
                      )
                  : Container(
                      height: size.height * 0.72,
                      width: size.width,
                      alignment: Alignment.center,
                      child: Text("Not Available",style:
                      TextStyle(color: Colors.black,fontSize: 23),),
                    ),//Container
            ) //Expanded
Our Task is done now 🙌🙌
FULL CODE:-
Catch me on Linkedin:
If any doubt arises, feel free to ask in the comments or in Linkedin


